The mention of spring roll, most can relate to being the most common signature starter dish from any overseas Chinese restaurants. The typical spring roll you get from restaurants here is deep fried. I prefer the healthier version where one could eat right away after the skin is freshly prepared, hot from the pan. My mum make the best fresh spring roll skin from scratch. She used to make and sell the spring roll skin during Chinese festivities. I used to help her to peel the skin off the hot iron cast pan, although it's not my favorite task. Yeah, it's a lot of hard work, but the effort is well worth it having try the spring roll she made. I still can't master her skill in whipping out the elastic batter and the guts to plaster the batter onto the hot cast iron pan with her hand. Here's a video showing how typical fresh spring roll skin is being made.
Well, I took a different approach to making the skin, first the batter is more runny and secondly I used silicone pastry brush to create the thin spring roll skin [ahem! don't wanna burnt my hand in the attempt to master my mum's skill] . But I'm not sure whether she'll be delighted to know my methodologies in creating this delightful fresh spring roll skin. :-)
Well, I took a different approach to making the skin, first the batter is more runny and secondly I used silicone pastry brush to create the thin spring roll skin [ahem! don't wanna burnt my hand in the attempt to master my mum's skill] . But I'm not sure whether she'll be delighted to know my methodologies in creating this delightful fresh spring roll skin. :-)

Popiah skin (Spring Roll skin)
Ingredients (made about 20-22, 6 inches diameter sheets)
- 150 gm bread flour
- 400 ml water
- 1 tsp baking powder
- 1/2 tsp salt
- Seive the flour+baking powder into a mixing bowl.
- Add in the salt and water and mix well until no lumps. You should obtain quite a runny batter.
- Let it rest for 15-20minutes.
- Heat up a non stick pan on low heat. Dip a paper towel with some vegetable oil and lightly grease the pan. Once it's hot, remove th epan from the hob, brush the pan with the batter using a silicone pastry brush, make sure you make a really thin sheet. Plaster any holes, bring the pan back onto the hob and let it cook. You'll see the sheet will rise on the edges, using a fork or your fingers, peel of from the pan. Lay it on a plate. Repeat until you've consumed all the batter.
Ingredients
- 2 cups of taugeh (bean sprouts)
- 1/2 kg of Chinese turnip ( I can't find turnip here, so I subtitute with 300 gm cabbage)-shredded
- 3 dry shitake mushrooms- soaked till soft and shredded
- 1/2 bell pepper-diced
- 2 carrots-shredded
- 2 shallots-minced
- 1 celery stalk - sliced thinly
- 10 medium prawns-peeled, cleaned and deveined. Diced.
- 1 Chinese lap cheong (sausage)-optional
- 1 tbsp light soya sauce
- 1/2 tbsp oyster sauce
- 1 tsp sugar
- 1 tsp white pepper
- 1/2 cup of roasted groundnut-coarsely grind
- 1 tbsp vegetable oil
- 1/2 tsp of sesame oil
- 1 egg-make into omelette-shredded
- spring onion for garnishing

- Heat a wok on high heat. Pour in the vegetable oil, add the sliced sausages and fry till a wee bit smoky aroma, add in the shallots and fry till lightly brown. Add the prawn and toss, once it's pink, add in the mushroom, diced pepper, celery, shredded cabbage and carrot. Stir fry for 3minutes till the vegetables it slightly cook.
- Add in the seasonings-oyster sauce, light soya sauce, white pepper, sesame oil and sugar. Mixed well. Off the heat, mixed in the bean sprouts and toss to mix.
- Dished out onto a plate.
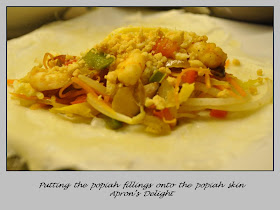
- Lay a spring roll sheet onto a plate, scoop some fillings as dry as possible onto the wrapper. Top up with some shredded eggs, peanuts and spring onion. Wrapped up and served immediately.

Tips: If you wanted to deep fry the spring roll, I recommended that you kept the skin overnight. Wrapped with 2 layers of skin the next day with the fillings and deep fry them. One sheet of skin is probably to thin to allow you fry as the ingredients might burst out during frying.

very nice, everything from scratch, wow!
ReplyDeleteHi Adel,
ReplyDeleteSedap :-)
This is brilliant! Does this method still result in wrappere with their usual elasticity/chewiness?
ReplyDeleteThis is a very nice recipe!
ReplyDeleteThanks for showing how to make the dough cover :D
Cheers from Brazil,
Higor